Handy homeowners often undertake roofing projects on their own because it’s a way to save money. However, if there are larger issues that require a professional, then calling in a roof repair company might be the best option.
To make your DIY roofing project go more smoothly, follow these tips.
1. Make Sure Your Shingles Match
When choosing a shingle color, it is important to match it with your house’s siding color and type. This will make sure that the roof and the home are coordinated, and that no one element stands out too much or looks out of place. You will also want to consider the building materials used in your home’s construction, as this will have a major impact on what kind of shingles you should choose. Brick homes, for example, look best with shingles that complement the accent tones of the stonework in the exterior walls. Frame or stucco houses, on the other hand, look good with a dark gray or black shingle.
Another factor to consider is the climate where you live. If your house is in a warm area, a darker roof will help to keep it cooler and hide any dirt or wear better than a lighter roof would. Also, if you have gutters that collect rainwater and run off the roof, a dark shingle will help to hide the debris and dirt that gets stuck in the gutters, which can lead to water damage inside your home.
Once you have decided on a shingle color, it is a good idea to go out and look at the roofs of some of your neighbors’ homes. This will give you a good idea of what kinds of shingles are popular in your neighborhood, and you might even be able to get some ideas for your own home’s roof!
If you are unsure of what colors might look best with your home’s siding, it is a good idea to play around with online color visualizers. This will allow you to test out different combinations without ever having to invest any money in a renovation. Just remember that lighting can have a big effect on how a color will look, so be sure to try out your options in natural sunlight and in cloudy weather. This will give you a more accurate representation of how the shingles will actually look on your home, and will help to ensure that you are happy with the color choice before you make a final commitment.
2. Check Your Gutters
A gutter system is installed along a roof’s edge to catch and channel runoff water away from the home. Gutters that are clogged or damaged fail to perform this function, which can lead to a number of problems including puddling, paint flaking off the structure and water leaking into the home itself. A leaky gutter can also damage siding, soffit and fascia components, causing them to rot, which could then lead to the need for costly repairs or replacement.
Even if you’ve splurged on the highest quality gutters, they can develop tiny cracks and holes over time. The best way to spot these issues is to check your gutters for leaks regularly, and take action as soon as you see them.
Inspecting gutters for leaks is relatively easy to do and requires only a ladder and a garden hose. First, find a good place to set up your ladder where you can easily reach the gutters without straining or falling. Once you’re in position, start by flushing the gutters with a hose. This will help to loosen any fine materials that might be clogging the downspout and make it easier to unclog the downspout when you’re ready to do so.
Once the gutters are clear, test them for leaks by filling them with water and watching to see if it flows through without a hitch. If it doesn’t, the gutters need to be re-lined with a new gutter liner. Also, check to make sure the downspout is working properly by pouring water into it and observing whether it drains easily. If it doesn’t, the slope of the gutters needs to be adjusted by relocating the hangers or spikes up or down to create a better flow.
The gutters may also need to be replaced altogether, if they’re showing signs of sagging. In this case, the sagging is most likely due to a loose rafter hanger or spike, which may need to be tightened or replaced. Rather than attempting to repair or replace them, you should hire a licensed roofing contractor to do it for you.
3. Remove the Old Shingles
The first step in replacing the shingles on your roof is to remove the existing ones. Start at the top of your roof and work a large garden fork underneath the ridge cap shingles, prying them loose and tossing them into the dumpster. Next, begin removing the shingle courses in 2- to 3-foot sections as you move down the roof. Work your fork under the shingles and felt paper, prying them up, and allowing them to slide down the roof to the gutters or a trash can below. Keep in mind that shingles are heavy, so it’s important to use a sturdy fork that won’t catch on the nails.
As you remove the shingles, be sure to take note of any areas that are damaged. A few dents or cracks in the shingle may seem insignificant, but if these become more serious you’ll need to have the damaged areas replaced before it’s too late.
Once you’re done removing the old shingles, install your new ridge shingle. Line up the full shingle with the adjacent course and nail it into place. Use a bit of roofing tar to help seal the nail that’s holding the last shingle on the ridge and prevent water from seeping in.
Once the ridge shingle is in place, you can install your remaining shingle courses. Be sure to overlap the edges of the new shingle with the previous one for a better finish. After the overlapping has been completed, nail the shingle down with a hammer and a finishing nail along each side of the shingle for added strength. Also, be sure to cut the last shingle on each row so that it is the preferred length. This will ensure that none of your roof is exposed to the elements. Finally, be sure to perform a final inspection to make sure there are no exposed nails, gaps or missed areas. Then, clean up your work area and your roof to prepare it for the next phase of the project. It’s also a good idea to lay down tarps to protect your yard and lawn from the roofing materials that are sure to fall from your roof and roll off onto the ground.
4. Install the New Shingles
Before you start attaching shingles, it’s important to lay a layer of self-stick underlayment on the roof. This acts as another layer of protection from water and ice. It’s available in rolls at most hardware stores and can be easily cut to size with a utility knife. Make sure you have enough to cover the entire roof area. If you’re unsure how much to buy, use this roofing calculator to help you figure out how many squares of shingles your roof is.
Once the underlayment is in place, you’re ready to start laying out the new shingles. Start at the bottom edge of the roof and work your way up to the ridge. Before you begin, read the manufacturer’s instructions for your specific type of shingle. If you’re unsure how to install a particular type of shingle, ask the salesperson at the hardware store for assistance.
Lay out the first course of shingles (also called a starter strip) so they overhang the drip edge by about a half-inch. This row of shingles is designed to provide a protective barrier and seal the exposed edges of the underlayment.
After the first course of shingles is in place, lay a second row so it overhangs the previous shingle by about a quarter inch. This will also protect the underlayment and help prevent moisture from seeping into your home. After the second row is in place, nail down a third course of shingles so they overhang the previous two rows by about a half-inch.
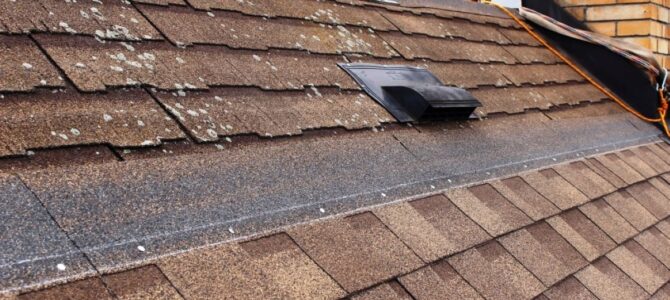
When you get to the top of your roof, install a ridge vent. Read the instructions for your particular type of ridge vent to ensure it is installed correctly. Then, install a perforated ridge shingle or three-tab shingles that are cut into squares to cover the ridge.
While it’s always best to hire a professional contractor to complete any major roofing project, DIY homeowners can save a lot of money by re-shingling their own homes. Just remember to follow these simple tips to avoid shoddy workmanship that may voided your warranty and lead to leaks down the road.